Pages

Wednesday 26 June 2024

After the Third Apocalypse - Zombie Campaign part 4

 Part 4 of my campaign set in my post apocalyptic world of 2500AD. The Zombies of Russia periodically rise up and batter their way through eastern Europe intent on devouring the rich pastures of western Europe.

The campaign will involve four battles, all using the One Hour Wargames rules for Pike and Shot as adapted for Zombies and appropriate scenarios to build a narrative. Basically it will let me play with the three armies I have painted.

Following the Zombie victories in part 1 & 2 the Medieval forces stopped the Zombie menace in part 3. Part 4 is to hold out a desperate last stand to even the score.

The Medieval forces have the technology to produce armour that can stop zombies biting them and turning them to zombies. This stops their casualties becoming part of the problem. They have primitive guns and can run out of ammunition. 

30: Last Stand - the humans trying a final defence against the encroaching zombie horde.

Narratively the last stand is an attempt to halt the zombie menace long enough for the civilian population to escape.

Zombie rules adaptations are:

Zombies count as Infantry who can't shoot. Out of ammo from start of each game.

Zombie Unit Combat: When zombies cause any casualties on an opposing unarmoured unit they will get “reinforcements” from the enemy dead. These reinforcements will be equal to one half of the casualties caused rounded down. These will reduce the Zombie unit casualty marker by the same amount. The marker cannot be reduced below zero.

Human Unit Morale: When a human unit is activated, roll a D6 and add it to the current casualty marker of the unit. If the result is 15 or greater, the unit must retreat one full move. 

Scenario 30 Last Stand: The zombies need to destroy all the human units by the end of turn 15. Any zombie unit lost comes back the following turn from the start line.

All human units are considered elite and have +2 for all combat rolls.  One human unit is in a redoubt that means it is considered in cover and which takes the zombies one turn to enter and attack the humans within.

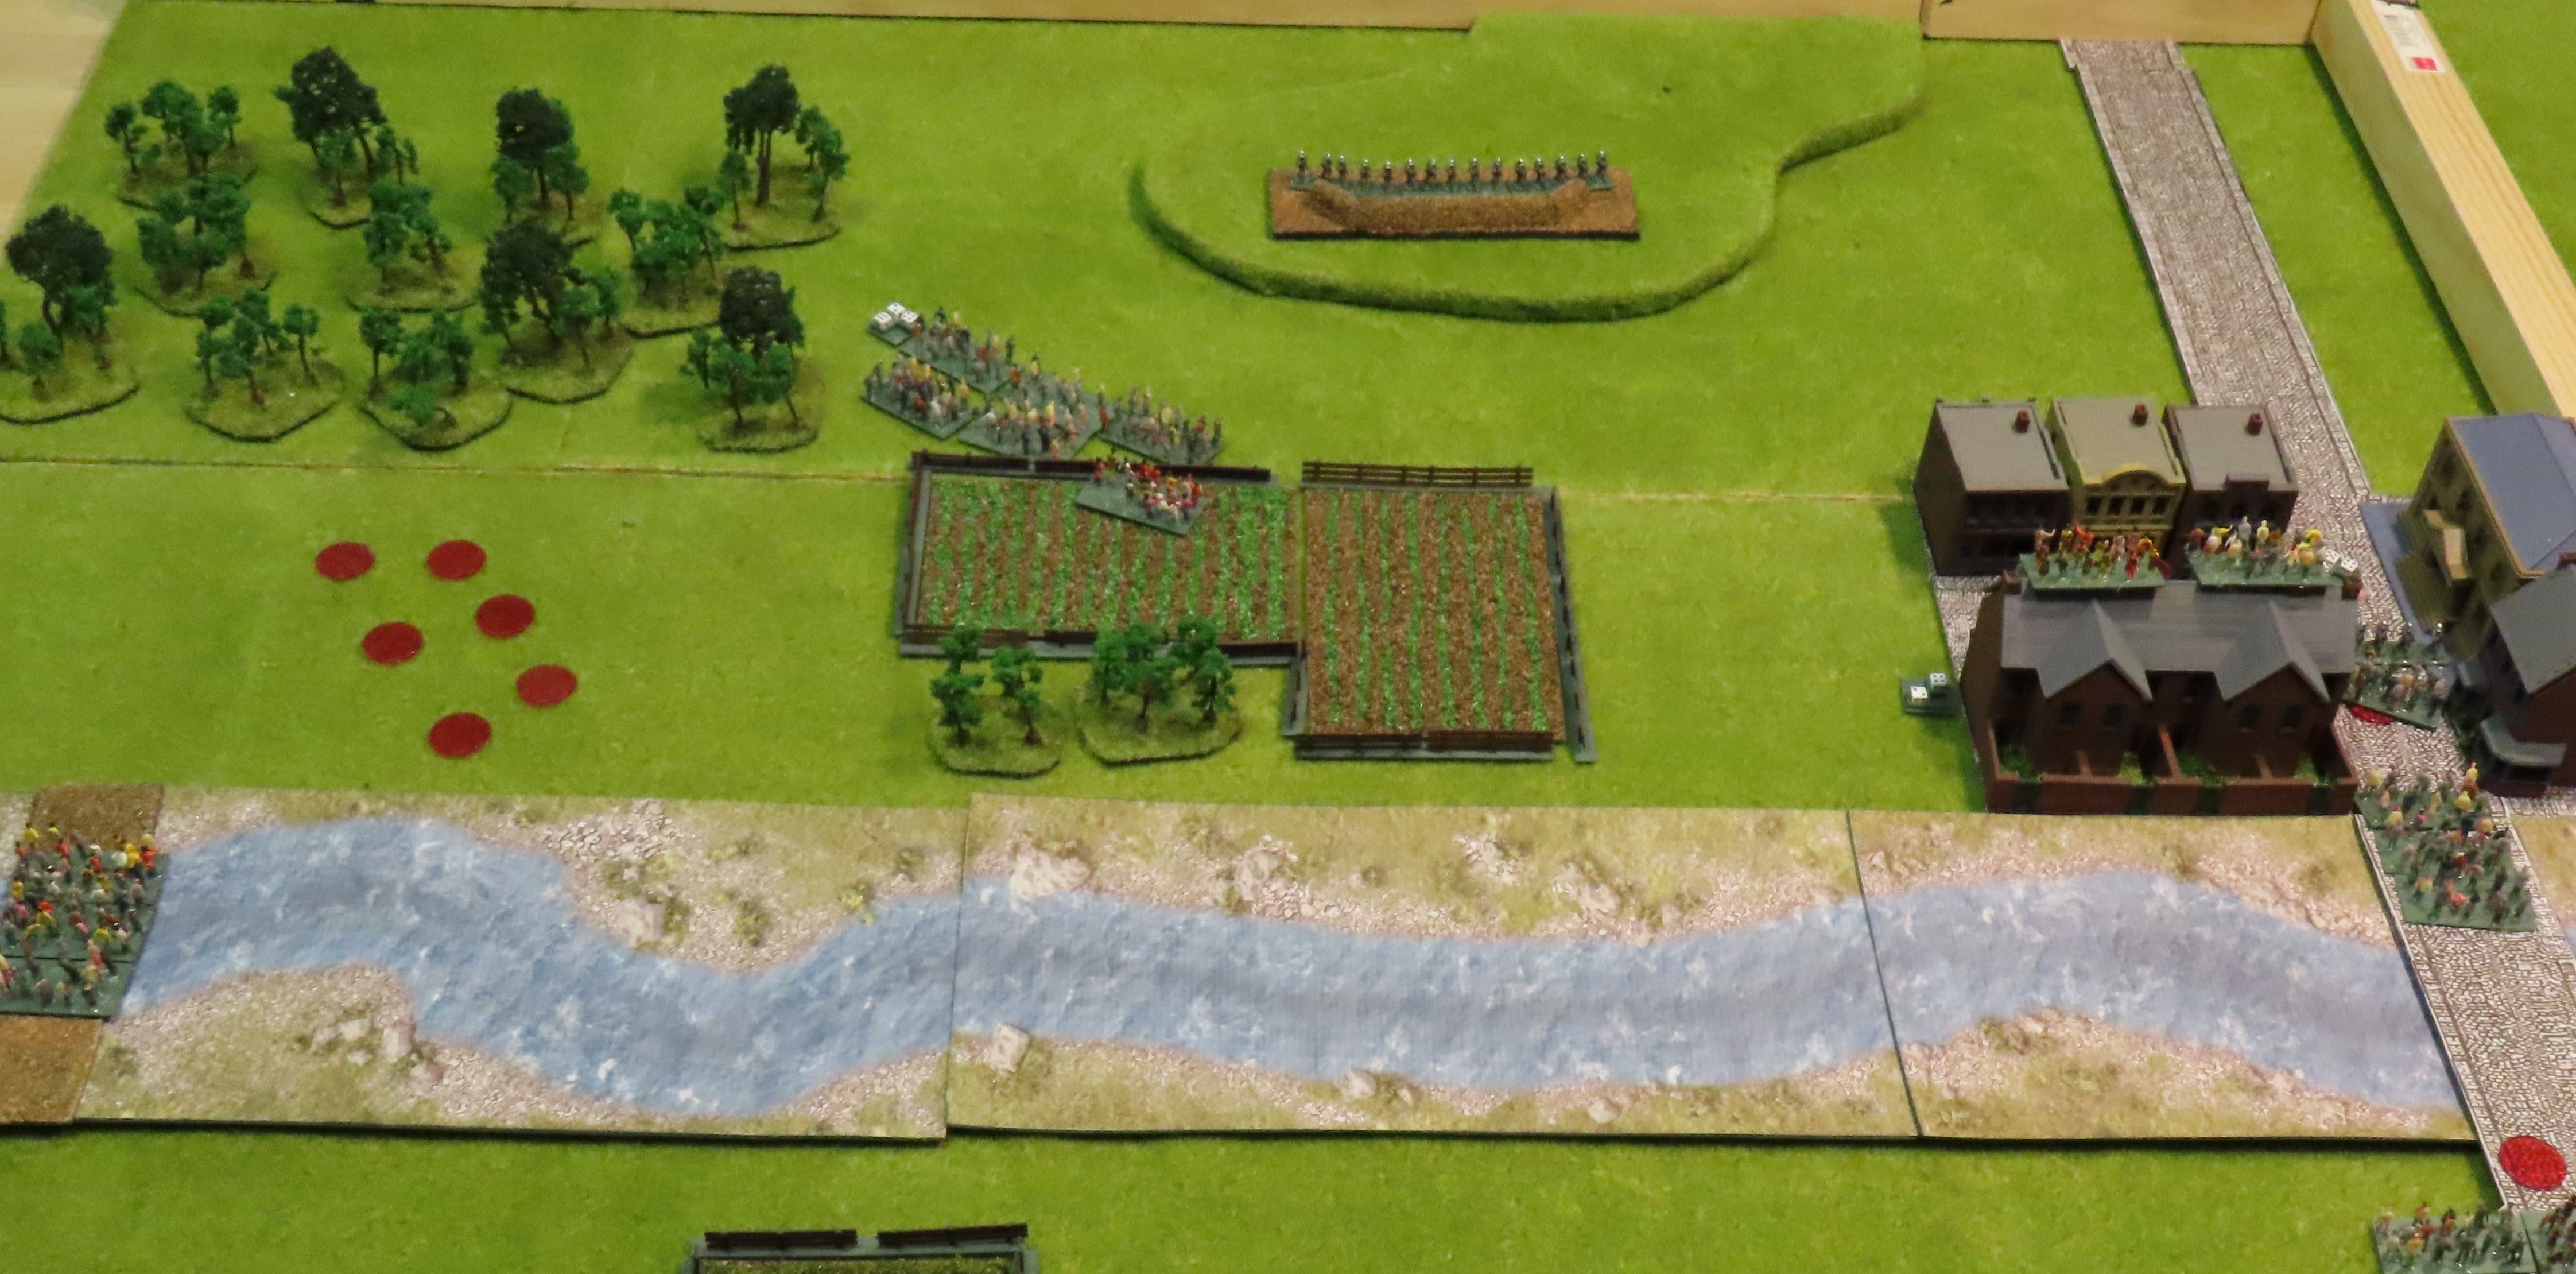
 I have added additional decorative terrain in the form of fields and a small wood to the layout. These have no impact on the game other than to make it look better. The large wood is impassable to all units.

Where a unit is destroyed will be marked by three red counters - to help show the carnage of the battlefield.

End of turn 1 - the zombies advance and humans fire at the advancing hordes causing 7 & 8 casualties from left to right.

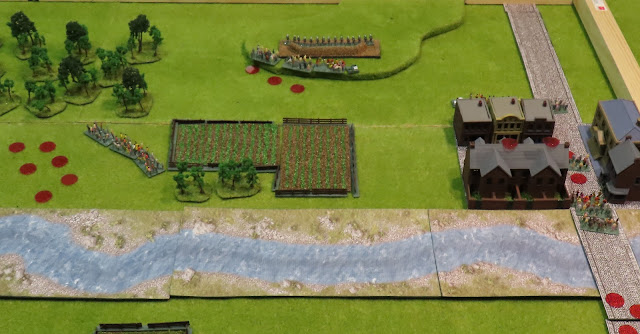
End of turn 2 - the zombies continue their advance. On the left the human unit has run out of ammo. On the right another round of fire has managed to destroy the leading zombie horde. However this unit has also run out of ammo.

End of turn 3 -the zombies are crossing the ford and the bridge. The human units have retreated so they can charge the next turn and cause the first casualties.

End of turn 4 - the humans charge but cause few casualties.

End of turn 5 - the hand to hand combat continues. On the left the zombies reach 13 casualties and on the right only 4. Both human units have very few.

End of turn 6 - the combat continues. ( I realise now looking at the photos I forgot to update the zombies casualties on the left - oops!) On the right they reach 10 casualties vs 4 for the humans.

End of turn 7 - zombies on the left are destroyed. Human casualties there are 11. On the right the zombies casualties are 13 vs 6 for the humans. The line is holding!

End of turn 8 - The humans on the left have been destroyed. On the right the zombie unit is destroyed but the humans now have 8 casualties. Still the line may hold.

End of turn 9 - on the left the zombie hordes advance towards the redoubt. It will take them a few turns to get there and then they need to destroy the human unit.

End of turn 10 - The humans on the right still hold on but with 14 casualties they can only last one more turn.


End of turn 11 -The zombies on the left have been destroyed by fire from the redoubt. On the right the humans have gone down to the zombie hordes.

End of turn 12 - the zombies contact the redoubt from the left and on the right more zombies make their way through the town.

End of turn 13 - The zombies continue their assault but the humans hold.

End of turn 14 - another zombie unit is destroyed but two others take its place with more following.

End of turn 15 - the humans have held on! They would not last much longer but they have held on enough. The evacuation is completed.


So the score is now tied at two all. Maybe one more game to settle the issue.
I have always thought that modern battle techniques would not work against zombies and that Napoleonic tactics would be much better. One more game to see if I am correct.

Figures:
Medieval troops with guns are from Pendraken 
Zombies are N scale railway people from Aliexpress. They come painted, all I had to do was base them and add some red. This is a very quick and cheap way of creating a zombie horde. Not as good as Pendraken's but much easier to get the mass.

The town buildings are from Outland Models. A quick modelling night has created the fields to go inside the fences. I think it looks much better than before.


Wednesday 12 June 2024

After the Third Apocalypse - Zombie Campaign part 3

 Part 3 of my campaign set in my post apocalyptic world of 2500AD. The Zombies of Russia periodically rise up and batter their way through eastern Europe intent on devouring the rich pastures of western Europe.

The campaign will involve four battles, all using the One Hour Wargames rules for Pike and Shot as adapted for Zombies and appropriate scenarios to build a narrative. Basically it will let me play with the three armies I have painted.

Following the Zombie victories in part 1 & 2 the Medieval forces need to stop the Zombie menace.

The Medieval forces have the technology to produce armour that can stop zombies biting them and turning them to zombies. This stops their casualties becoming part of the problem. They have primitive guns and can run out of ammunition. Not all the Medieval forces are armoured, so these have to be protected in walled cities or hastily prepared field fortifications.

Narratively this battle in the campaign is to stop the zombie hordes destroying these lands.

15: Fortified Defence - stop the Zombies occupying the two towns by the end of the game.

There are two fortified towns in this scenario represented by walled buildings. The Zombies need to take both by the end of the game. However, both towns also come with additional fire power in the form of artillery that can engage in fire and close combat. The Medieval forces can locate one unit in each town, when that unit is destroyed the artillery is automatically destroyed as well. Units are destroyed when they reach 15 casualties.

Human units that have reached 9 or greater casualties must roll a morale die each turn. If the total of their casualties and the die roll equals or exceeds 15 they must retreat one full move.

Once during the game the Zombies can remove any remaining units of their army and replace them with a complete new set of 6 units of zombies on their start line. 

I have added additional scatter terrain in the form of fenced fields and a road to the board. These have no impact on the game and are their to make it look better as the OHW setups can be quite bare. Realising that the fields are not that interesting without anything in them I have created additional terrain for the next game.

When a unit is destroyed, I will show it by placing a red counter for each base. 

On to the battle.

End of turn 1 - the zombie hordes approach the battlefield. The Medieval forces have deployed one unarmoured unit with guns in each town with the supporting artillery. Three armoured units with guns cover the gap between the first fortified building and the woods and a unit of mounted knights are in the rear as a reserve.
The zombies have already taken some losses from gun fire. 

End of turn 2 - The zombies have reached the first fortified building but one unit has been destroyed. The artillery has run out of ammo.
 Further losses have been inflicted on the other zombie units but two of the three human units have run out of ammo.

End of turn 3 - The zombies have contacted the human line and inflicted casualties but all have received significant casualties themselves.

End of turn 4 - at the wall of the fortified building the battle continues with zombie casualties of 11 vs human casualties of 6.
The next human unit to the left failed its morale roll after a devastating zombie attack caused 6 casualties, taking them to 11, and have retreated. In the center the humans have caused 14 casualties on the zombies while only receiving 5. On the right the humans have destroyed the zombie unit but have received 7 casualties. 

End of turn 5 - another three zombie units have been destroyed and only one remains. Nonetheless they have caused significant casualties to the human units. From left to right - 10, 11, 7, & 7. As well only two of the front line units have ammo left.

End of turn 6 - the zombies have brought on their second horde. It advances towards the human lines. Some scattered fire causes eight casualties on the zombie unit approaching the building but the human units both run out of ammo.

End of turn 7 - one zombie unit is destroyed but the human unit in the building now has 12 casualties. The rest of the human line awaits the zombies. (I realise now that the humans should have advanced into contact at this point and caused the first casualties rather than wait for the zombies)

End of turn 8 - the human units in the fortified building have been destroyed. The humans in the center are holding on with the support on the flank but the humans on the right have retreated after reaching 14 casualties.

End of turn 9 - the zombies occupy the first fortified building. In the center the humans retreat after both having 11 casualties. On the right the zombies catch and destroy the retreating humans and the fire from the fortified building is ineffective and only causes 3 casualties on the zombies.

End of turn 10 - the zombies in the center contact and destroy the human units. The knights counter attack but only inflict a few casualties. The remaining fortified building fights back against the zombies causing 7 casualties against 1 received.

End of turn 11 - the zombies in the center get ready to flank the knights. Disappointing combat rolls by both sides. On the right the first zombie unit is destroyed after only inflicting 1 more casualty. Maybe the humans will hold on. 

End of turn 12 - The knights have been able to destroy their immediate opponents but now face new ones on their flank. The knights have received 11 casualties so will struggle. At the wall of the final building the humans hang on, with only 4 casualties to the zombies 8.

End of turn 13 - The knights have retreated in the center having received 13 casualties. At the wall the humans bravely fight on with the zombies now at 14 casualties against 6 for the humans.

End of turn 14 - It looks like the humans will hold on. The zombies at the wall have been destroyed. The human defenders have 8 casualties and the zombies only have one more turn.

End of turn 15 - the zombies have lost! 

Figures:

Medieval figures are from Pendraken 

Zombies are N scale railway people from Aliexpress. They come painted, all I had to do was base them and add some red. This is a very quick and cheap way of creating a zombie horde. Not as good as Pendraken's but much easier to get the mass.

The town buildings are made by me, originally for my VSF War in the Antipodes.

Onto the final part of the campaign where the Zombies fight the later Medieval tech humans who are performing a courageous last stand.