Pages

Wednesday 24 July 2024

Moon Wars Campaign Part 1

 This is the first post in a narrative campaign between Space X and Blue Origin to control the moon. This will let me play with my Astronauts with guns and associated terrain and vehicles.

Campaign Background

Space X has built a base on the moon to support the establishment of a colony on Mars. Blue Origin has built a base to support the establishment of O'Neil Space Habitats. Both have found that their dreams are larger than the capital they have available.

Space X has decided on a hostile take over of Blue Origin's assets on the moon and has launched a surprise attack in an extension of their corporate competition for the moon's scarce resources. Luckily Blue Origin has had time to prepare some defenses but they will always be out numbered by Space X.

The campaign will be four battles taken from the One Hour Wargames scenarios. Rules will be Wiley Games' Fistful of Lead Bigger Battles. Hopefully the two systems will match up. The table will be 120cm by 90cm instead of the 90cm square recommended by OHW to hopefully account for the longer weapon ranges in Bigger Battles.

Battle One    Scenario 26 Triple Line

Space X has launched a surprise attack on Blue Origin. Space X attacks with 6 units and Blue Origin has 4 for defense.

Battle Two    Scenario 25 Infiltration

Blue Origin forces need to break through the Space X lines to escape encirclement. Once again Blue Origin is outnumbered 4 units to 6. 

Battle Three    Scenario 22 Ambush

Space X is besieging a Blue Origin base. While outnumbered 6 units to 4 a Blue origin relieving force needs to surprise and destroy the larger Space X force to break the siege.

Battle Four     Scenario 21 Twin Objectives

A final attack by Space X to defeat a smaller Blue Origin force and capture a base and nearby hill.

If the honors are even after 4 battles I may have a bonus battle.


Battle One    Scenario 26 Triple Line

Space X has launched a surprise attack on Blue Origin. Space X attacks with 6 units and Blue Origin has 4 for defense. All the squads count as green except for the Space X robot tanks that are regular.

Surviving squads for each side will be upgraded to regular for the next battle.

Space X force is white and Blue Origin force is orange. 

The OHW scenario uses a river crossed by a bridge but I have changed this to a line of craters with a gap in the middle as forcing Space X to go through a small gap while under fire would make it too difficult. In retrospect this was probably incorrect.

Only the craters, the hill and the rocky area on the right count for terrain effect, all other items are for decoration only. 

Victory conditions is holding the hill at the end of turn 15.
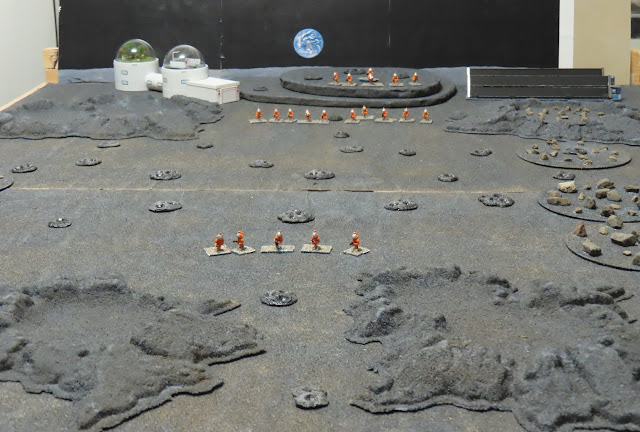
Start of the game. 4 Blue Origin units defending the base. Per the scenario rules they cannot move until a Space X units comes within 6 inches.

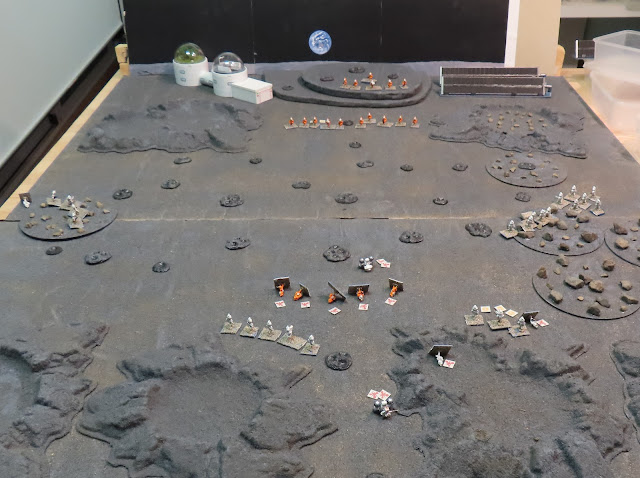
End of turn 1 - Space X has advanced on to the battle field. One squad each in the three craters from left to right and two squads in the right side crater from which they will advance through the rocky area. The Space X  robots have killed two Blue Origin astronauts and inflicted two shock but one robot has been destroyed.

End of turn 2 - the Space X astronauts have crested the craters. Another Blue Origin astronaut has been killed.

End of turn 3 - Space X advances on the right. The advanced Blue Origin squad has been destroyed. One Space X astronaut has been killed by return fire. 

End of turn 4 - Space X advances on the flanks and retreats in the center. One hit is made on the Space X robot.

End of turn 5 - Space X advances across the line. On the left one Space X astronaut is killed  and another in the squad on the right plus three shock. The robot receives another hit and is destroyed.

End of turn 6 - this was a bit of a surprise. Nearly all the Space X squads activated before the Blue Origin squads and the result was two Blue Origin squads were basically destroyed with either dead or shock meaning they did not return fire. With only one squad remaining against four and a half Space X squads Blue Origin decided to retreat.

A gratuitous photo of the Blue Origin base. Soon to be added the Space X's Luna portfolio via hostile takeover.

Final Thoughts: The Bigger Battles rules seemed to work Ok although the vehicle rules are a bit vague. I was a bit worried by the final turn as it led to the destruction of  the Blue Origin force but I think that it was a result of the random activation not the rules. 

One drawback of using the two systems is that I think Bigger Battles needs more blocking terrain than is provided by the OHW scenarios. I may add additional terrain in future battles to help with maneuver.


Figures

Astronauts with Guns from Pendraken as are the small craters
Robots from GZG games (I think)
Buildings and solar array are made by me.


Tuesday 9 July 2024

After the Third Apocalypse - Zombie Campaign - Bonus Game

A bonus game for of my campaign set in my post apocalyptic world of 2500AD where the Zombies of Russia periodically rise up and batter their way through eastern Europe intent on devouring the rich pastures of western Europe. 

The campaign involved four battles, all using the One Hour Wargames rules for Pike and Shot and adapted for Zombies, and appropriate scenarios to build a narrative. As the score is two games each for Zombies and Humans a bonus game where the Zombie horde has to defeat a Dutch Napoleonic army that represents the higher technology of the civilizations further from the borders. 

In this battle the Dutch will use the Horse and Musket OHW rules while the zombies continue using the rules designed earlier.  

As done for prior games, three red counters will be placed where ever a unit is destroyed.  

OHW Scenario 1: Pitched Battle. A symmetrical battlefield with a hill on either side. 

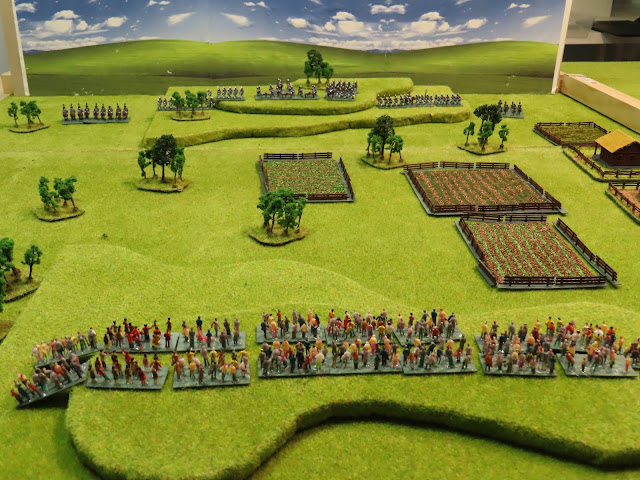
Start of game with the zombie hordes advancing towards the Dutch army of three infantry units, one Artillery Battery of three guns, and one unit each of cavalry and skirmishers.
Only the hills have any impact on combat or movement. All other terrain is purely for decoration.

End of turn 1 - the Dutch artillery fires but gets no hits, The Dutch army forms up on the hill where they will get a close combat bonus and wait for the zombies to get in range.

End of turn 2 - Again only the artillery can fire and they cause some hits. The skirmishers and cavalry have moved to the flanks of the zombies

End of turn 3 - finally in range the Dutch firing line opens up causing varying amounts casualties to the front zombie hordes.

End of turn 4 - the Dutch infantry have fired but have been contacted by the zombies. The Dutch cavalry are ready to charge.

End of turn 5 - the Dutch cavalry have charged the zombie horde in the rear and caused 10 casualties but then retired. In the center one zombie horde has been destroyed while only a few casualties have been inflicted on the Dutch infantry.

End of turn 6 - more zombie units fall and the Dutch Cavalry move to attack a different horde. On the right hand side the Dutch infantry have received 7 casualties and in the center 6. Facing fresh zombie hordes they may not be able to hang on.

End of turn 7 - Two more units of Zombies are destroyed. All Dutch units are still active but  all have casualties. The unit in contact with the zombies has 9 casualties and will need to roll for morale next turn.

End of turn 8 - the Dutch infantry fail their morale and retire. The zombies are distracted by the skirmishers firing on them from behind and turn to attack them. The cavalry form up to charge and the other Dutch infantry move to destroy the remaining zombie unit/horde.

End of turn 9 - the final zombie unit is run down and destroyed by the cavalry.

The zombie menace is destroyed. No doubt the surviving inner parts of the European civilisation will push outwards over the weakened Medieval, Outlanders and Waste landers and so gradually re-building the world.

Anyway a fun set of games for me and I enjoyed the campaign and narrative aspects which were easy to do but provided some structure for each game and the series. Once I had the main story decided I then spent an enjoyable hour or so perusing the OHW scenarios for appropriate ones.

Figures:

Dutch Napoleonic are from Pendraken 

Zombies are N scale railway people from Aliexpress. They come painted, all I had to do was base them and add some red. This is a very quick and cheap way of creating a zombie horde. Not as good as Pendraken's but much easier to get the mass.

The buildings are from Outland Models and trees from Aliexpress.

Where to next? I think the moon.