Pages

Wednesday 4 September 2024

Moon Wars Campaign Part 4

This is the fourth post in a narrative campaign between Space X and Blue Origin to control the moon. This will let me play with my Astronauts with guns and associated terrain and vehicles.

Campaign Background

Space X has built a base on the moon to support the establishment of a colony on Mars. Blue Origin has built a base to support the establishment of its O'Neil Space Habitats. Both have found that their dreams are larger than the capital and resources they have available.

Space X has decided on a hostile take over of Blue Origin's assets on the moon and has launched a surprise attack in an extension of their corporate competition for the moon's scarce resources. Luckily Blue Origin has had time to prepare some defenses but they will still always be out numbered by Space X.

Battle Four Scenario  Scenario 21 Twin Objectives     (OHW scenario book)

A final attack by a Space X force of 6 squads that need to defeat a smaller Blue Origin force of 4 squads and capture a base and nearby hill.

Rules used:   FFOL Bigger Battles

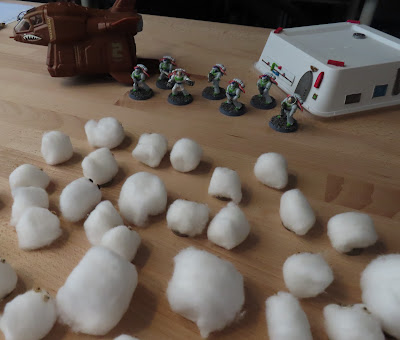
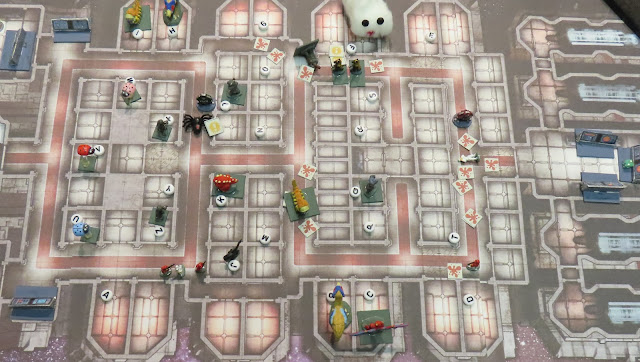
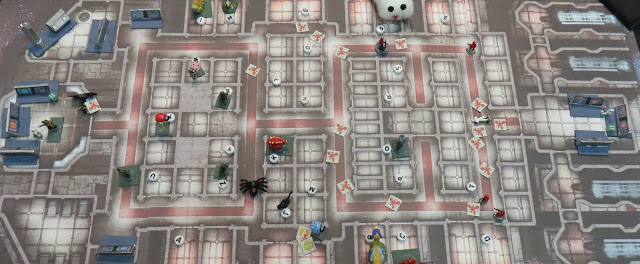
Start of the game. A force of six squads of Space X comes from the right hand side of the table.
One squad of Blue Origin holds the hill in the bottom right hand side and three squads of Blue Origin hold the base. These three squads are sheltering behind vehicles that have been moved to provide a  barricade against the advancing Space X hordes.

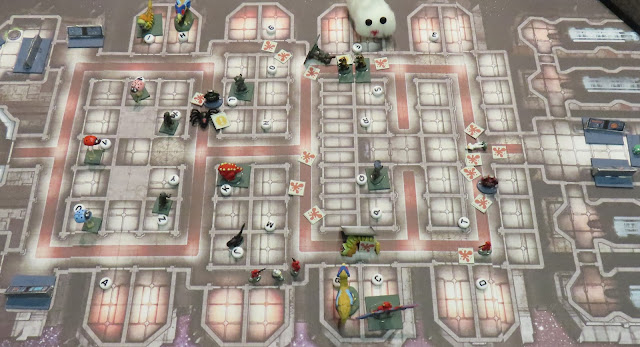
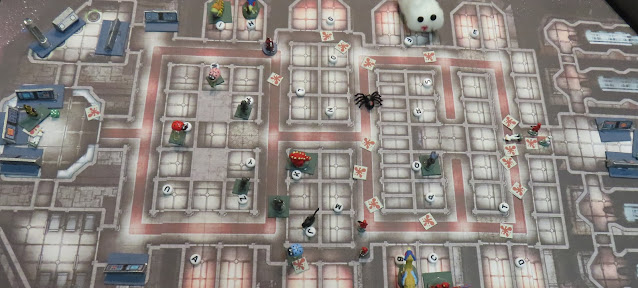
End of turn 1 - Space X has moved three squads to attack the hill and the other three squads have moved towards the base but remain out of range. The Blue Origin squad on the hill has moved to the edge of the hill and opened fire but has only managed to inflict 4 points of shock on one Space X squad.

End of turn 2 - Space X initiative cards are better than Blue Origin's. In addition to going first they also draw the Queen of Spades which allows them to remove all shock from one unit and then fire. Two Space X squads get to fire at the Blue Origin squad on the hill and despite its cover it is destroyed. The other Space X squad moves towards the solar arrays while the three squads remain out of range of the Blue Origin squads in the base. 

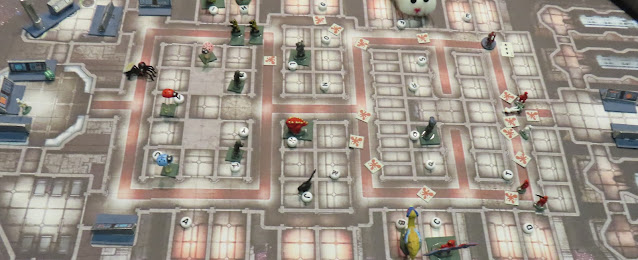
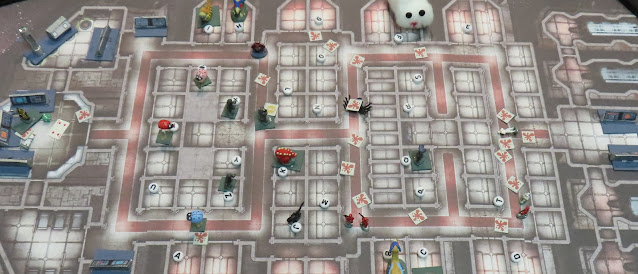
End of turn 3 - Blue Origin shuffle their squads to move one squad to the solar arrays to confront the Space X advance there. The other squads maintain their positions in the base.

End of turn 4 - Space X advances across the battlefield. Blue Origin deploys one squad past the Solar Array and they fire on the nearest Space X squad (sorry no firing indicator) and cause two dead and one shock. The Blue Origin squad in the base fires at long range at the advancing Space X squads but gets no hits.

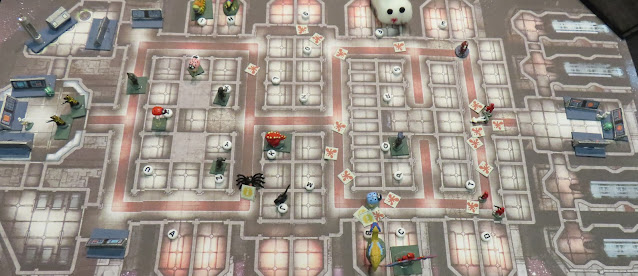
End of turn 5 - Once again Space X wins the initiative. At the base the top most Space X squad moves to close range and gets 4 killed and one shock. Return fire inflicts no casualties.
At the Solar Arrays Space X draws the Queen of Spades again as well as firing first and kills three Blue Origin defenders and sends the remaining two running for safety.  The last Blue Origin squad moves and fires and kills two Space X fighters and causes two shock. They will need to move first next turn if they hope to survive.

End of turn 6 - Space X again win the initiative and effectively destroy the remaining two Blue Origin squads. The remaining three Blue Origin Astronauts surrender. The battle is lost.

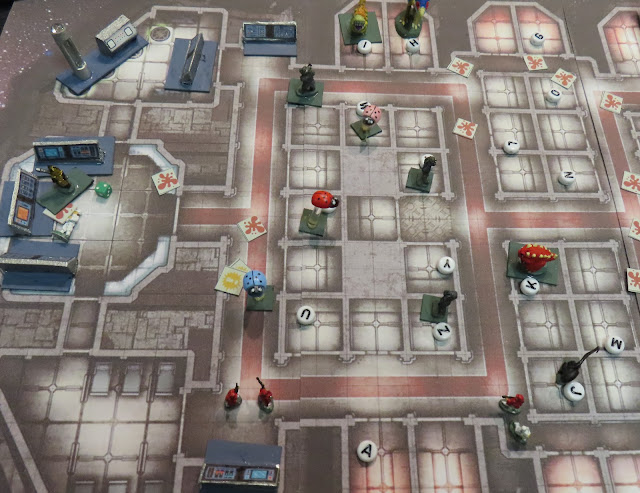
A gratuitous photo of my space base built using electrical conduit sections, clear Christmas ornaments and scratch built computers, screens and machines. 

Final Thoughts: The Bigger Battles rules seemed to work Ok. However they are very dependent on the luck of the activation of each side and the games left me a bit unsatisfied as they seemed to be determined by the first or second turns. I am not sure if the scenarios are unbalanced when using the FFOL rules or it was just the activation cards drawn in each of the games.

I don't think I will play a bonus tie breaker game. Mr. Bezos and Mr. Musk will have to settle for a draw.

Figures

Astronauts with Guns from Pendraken as are the small craters
Buildings and solar array are made by me


What next?

At least my readers have been spared zombies for the past eight weeks, hopefully this will continue 😁

Wednesday 21 August 2024

Moon Wars Campaign Part 3

 This is the third post in a narrative campaign between Space X and Blue Origin to control the moon's resources. 

Campaign Background

Space X has built a base on the moon to support the establishment of a colony on Mars. Blue Origin has built a base to support the establishment of its O'Neil Space Habitats. Both have found that their dreams are larger than the capital and resources they have available.

Space X has decided on a hostile take over of Blue Origin's assets on the moon and has launched a surprise attack in an extension of their corporate competition for the moon's scarce resources. Luckily Blue Origin has had time to prepare some defenses but they will still always be out numbered by Space X.


Battle Three    Scenario 22 Ambush (from the OHW scenario book)

A Space X force of 6 units is besieging a Blue Origin base. While outnumbered,  a Blue Origin relieving force of 4 units needs to destroy the larger Space X force to break the siege.

Space X has been caught by surprise and their squads cannot move or fire until turn 3.

To win the game Blue Origin need to destroy all of the Space X squads by turn 15.

Rules used:   FFOL Bigger Battles

The vehicles accompanying the Space X squads are purely decoration. They represent the squads' supplies as they besiege the Blue Origin base. From turn 3 I have added red and yellow rods to indicate who is firing at who. Red for Blue Origin and Yellow for Space X.

In addition to the terrain specified by the scenario I have added three large solar collector arrays for Space X to hide behind. Without these the scenario seems a bit silly considering the weapon ranges.

Some of my older readers may recognise the Blue Origin base being the Airfix D-day gun emplacement  repurposed from Normandy to the south polar region of the moon.


Start of Game. Blue Origin relieving force has reached the edge of the craters from where they will launch their relief effort. The Space X force has one squad guarding the craters, one squad near the base and their remaining four squads at the top of the table hiding behind the solar arrays. My plan for Space X was to use the two squads in the open to hold the Blue Origin force until Space X could activate in turn three.

End of turn 1 - Blue Origin has destroyed the first Space X squad and moved out from the craters to fire at the second Space X squad. The Blue Origin squad in the base has moved out to flank the main Space X force.

End of turn 2 - Blue Origin has killed three squad members of the Space X holding squad and a complete squad from the main force.

End of turn 3 - Only two Space X squads remain. The Blue Origin flanking force decimated another Space X squad sending it remaining two members fleeing from the battle field. Space X has managed to kill three members of one Blue Origin force but they are still outnumbered.

At this point of the game you would expect the remaining Space X forces to flee or surrender. But as my little metal men know no fear they battled on!

End of turn 4 - Space X manage to win the activations and can destroy one Blue Origin squad and finish off another. Unfortunately this leaves one squad in the open for Blue Origin return fire and this Space X squad is destroyed.

End of turn 5 - Space X needed to activate first, destroy one Blue Origin squad and then hide from any return fire. Unfortunately they activated second and were decimated with just one survivor running off to tell HQ the bad news.


Final Thoughts.      As mentioned in the last game, if one side gets the balance of the activations and moves or shoots first they get an enormous advantage, especially if they out number their opposition. Anyway a fun scenario to play out.

Now it is one win for Space X and two wins for Blue Origin. Will Space X be able to claw back a win to tie the campaign? Or will this go down as one of Elon Musk's business missteps. As bad as buying Twitter.

Figures

Astronauts with Guns and the vehicles are from Pendraken. I forgot to add the small craters for additional table decoration. I have corrected this in the next battle.

Wednesday 7 August 2024

Moon Wars Campaign Part 2

 This is the second post in a narrative campaign between Space X and Blue Origin to control the moon. This will let me play with my Astronauts with guns and associated terrain and vehicles.

Campaign Background

Space X has built a base on the moon to support the establishment of a colony on Mars. Blue Origin has built a base to support the establishment of its O'Neil Space Habitats. Both have found that their dreams are larger than the capital and resources they have available.

Space X has decided on a hostile take over of Blue Origin's assets on the moon and has launched a surprise attack in an extension of their corporate competition for the moon's scarce resources. Luckily Blue Origin has had time to prepare some defenses but they will still always be out numbered by Space X.

Battle Two    Scenario 25 Infiltration  (OHW scenario book)

Blue Origin forces need to break through the Space X lines to escape encirclement. Once again Blue Origin is outnumbered 4 units to 6. 

All four Blue Origin squads enter on turn one.

Space X have one squad set up at the start of the game. Two squads enter the north side of the table on turn three and a further three squads enter the southern side of the table by the road on turn six.

At least two Blue Origin squads need to exit of the north side by the road to win.

Rules used:   FFOL Bigger Battles

The vehicles accompanying the Blue Origin squads are purely decoration. They represent the squads' supplies as they walk to freedom.


Start of Game. A lonely Space X squad guards the road north. They are green - indicated by the green counter.

End of turn 1 - Blue Origin advances two squads to the hill and two squads straight for the exit. The Space X squad moved over the hill top and their fire has killed one Blue Origin Astronaut and put a lot of shock on the rest of the squad.

End of turn 2 - Activating first in a fire fight is very important. In this case both Blue Origin squads activated before the Space X squad which was eliminated by the short range fire. This was also helped by Blue Origin drawing the Queen of Spades which allowed them to remove all shock from the squad and then fire.

End of turn 3 - Space X has deployed two squads from the north. One in the rocks with cover and one from the road. The plan is to hold on until the Space X three squads arrive on the road from the south. Space X fire has killed one Blue Origin Astronaut and added 2 shock.

End of turn 4 - The fire fight continues. Two more Blue Origin astronauts are killed versus one for Space X, Shock is incurred by both sides. However, Blue Origin has moved up the other two of its squads into range.

End of turn 5 - Once again Blue Origin gets lucky with the activation cards meaning that they shoot before Space X. As well they draw an Ace which is wild and can be used as a Queen of Spades to remove the shock. The Space X squad in the open is chased away with a lot of shock and is no longer in the fight. The Space X squad in the rocky area suffers two dead and one shock. Blue Origin only suffer one shock.

End of turn 6 - The three reinforcing squads from Space X move onto the board but it looks like they are too late. The Space X squad in the rocky area was decimated and its remaining squad member has retreated. Blue Origin head for the exit.

End of turn 7 - Blue Origin once again win the activation draw and will escape. A last ditch volley by the leading Space X squad put one shock on the trailing Blue Origin squad but now they are low on ammo.


Final Thoughts.      If one side gets the balance of the activations and moves or shoots first they get an enormous advantage, especially if they out number their opposition. Anyway a fun scenario to play out.

I decided not to add any additional terrain for LOS blocking to reduce the impact of long range fire. Mainly because I didn't have anything appropriate and also to see if the first game's outcome was just an anomaly. I think if the activations are more even there will be a better balance.

Now it is one win each for Space X and Blue Origin and the campaign is still balanced.


Figures

Astronauts with Guns and the vehicles are from Pendraken as are the small craters.

The road is from my modern terrain. Not really appropriate but it will have to do.

Wednesday 24 July 2024

Moon Wars Campaign Part 1

 This is the first post in a narrative campaign between Space X and Blue Origin to control the moon. This will let me play with my Astronauts with guns and associated terrain and vehicles.

Campaign Background

Space X has built a base on the moon to support the establishment of a colony on Mars. Blue Origin has built a base to support the establishment of O'Neil Space Habitats. Both have found that their dreams are larger than the capital they have available.

Space X has decided on a hostile take over of Blue Origin's assets on the moon and has launched a surprise attack in an extension of their corporate competition for the moon's scarce resources. Luckily Blue Origin has had time to prepare some defenses but they will always be out numbered by Space X.

The campaign will be four battles taken from the One Hour Wargames scenarios. Rules will be Wiley Games' Fistful of Lead Bigger Battles. Hopefully the two systems will match up. The table will be 120cm by 90cm instead of the 90cm square recommended by OHW to hopefully account for the longer weapon ranges in Bigger Battles.

Battle One    Scenario 26 Triple Line

Space X has launched a surprise attack on Blue Origin. Space X attacks with 6 units and Blue Origin has 4 for defense.

Battle Two    Scenario 25 Infiltration

Blue Origin forces need to break through the Space X lines to escape encirclement. Once again Blue Origin is outnumbered 4 units to 6. 

Battle Three    Scenario 22 Ambush

Space X is besieging a Blue Origin base. While outnumbered 6 units to 4 a Blue origin relieving force needs to surprise and destroy the larger Space X force to break the siege.

Battle Four     Scenario 21 Twin Objectives

A final attack by Space X to defeat a smaller Blue Origin force and capture a base and nearby hill.

If the honors are even after 4 battles I may have a bonus battle.


Battle One    Scenario 26 Triple Line

Space X has launched a surprise attack on Blue Origin. Space X attacks with 6 units and Blue Origin has 4 for defense. All the squads count as green except for the Space X robot tanks that are regular.

Surviving squads for each side will be upgraded to regular for the next battle.

Space X force is white and Blue Origin force is orange. 

The OHW scenario uses a river crossed by a bridge but I have changed this to a line of craters with a gap in the middle as forcing Space X to go through a small gap while under fire would make it too difficult. In retrospect this was probably incorrect.

Only the craters, the hill and the rocky area on the right count for terrain effect, all other items are for decoration only. 

Victory conditions is holding the hill at the end of turn 15.

Start of the game. 4 Blue Origin units defending the base. Per the scenario rules they cannot move until a Space X units comes within 6 inches.

End of turn 1 - Space X has advanced on to the battle field. One squad each in the three craters from left to right and two squads in the right side crater from which they will advance through the rocky area. The Space X  robots have killed two Blue Origin astronauts and inflicted two shock but one robot has been destroyed.

End of turn 2 - the Space X astronauts have crested the craters. Another Blue Origin astronaut has been killed.

End of turn 3 - Space X advances on the right. The advanced Blue Origin squad has been destroyed. One Space X astronaut has been killed by return fire. 

End of turn 4 - Space X advances on the flanks and retreats in the center. One hit is made on the Space X robot.

End of turn 5 - Space X advances across the line. On the left one Space X astronaut is killed  and another in the squad on the right plus three shock. The robot receives another hit and is destroyed.

End of turn 6 - this was a bit of a surprise. Nearly all the Space X squads activated before the Blue Origin squads and the result was two Blue Origin squads were basically destroyed with either dead or shock meaning they did not return fire. With only one squad remaining against four and a half Space X squads Blue Origin decided to retreat.

A gratuitous photo of the Blue Origin base. Soon to be added the Space X's Luna portfolio via hostile takeover.

Final Thoughts: The Bigger Battles rules seemed to work Ok although the vehicle rules are a bit vague. I was a bit worried by the final turn as it led to the destruction of  the Blue Origin force but I think that it was a result of the random activation not the rules. 

One drawback of using the two systems is that I think Bigger Battles needs more blocking terrain than is provided by the OHW scenarios. I may add additional terrain in future battles to help with maneuver.


Figures

Astronauts with Guns from Pendraken as are the small craters
Robots from GZG games (I think)
Buildings and solar array are made by me.


Tuesday 9 July 2024

After the Third Apocalypse - Zombie Campaign - Bonus Game

A bonus game for of my campaign set in my post apocalyptic world of 2500AD where the Zombies of Russia periodically rise up and batter their way through eastern Europe intent on devouring the rich pastures of western Europe. 

The campaign involved four battles, all using the One Hour Wargames rules for Pike and Shot and adapted for Zombies, and appropriate scenarios to build a narrative. As the score is two games each for Zombies and Humans a bonus game where the Zombie horde has to defeat a Dutch Napoleonic army that represents the higher technology of the civilizations further from the borders. 

In this battle the Dutch will use the Horse and Musket OHW rules while the zombies continue using the rules designed earlier.  

As done for prior games, three red counters will be placed where ever a unit is destroyed.  

OHW Scenario 1: Pitched Battle. A symmetrical battlefield with a hill on either side. 

Start of game with the zombie hordes advancing towards the Dutch army of three infantry units, one Artillery Battery of three guns, and one unit each of cavalry and skirmishers.
Only the hills have any impact on combat or movement. All other terrain is purely for decoration.

End of turn 1 - the Dutch artillery fires but gets no hits, The Dutch army forms up on the hill where they will get a close combat bonus and wait for the zombies to get in range.

End of turn 2 - Again only the artillery can fire and they cause some hits. The skirmishers and cavalry have moved to the flanks of the zombies

End of turn 3 - finally in range the Dutch firing line opens up causing varying amounts casualties to the front zombie hordes.

End of turn 4 - the Dutch infantry have fired but have been contacted by the zombies. The Dutch cavalry are ready to charge.

End of turn 5 - the Dutch cavalry have charged the zombie horde in the rear and caused 10 casualties but then retired. In the center one zombie horde has been destroyed while only a few casualties have been inflicted on the Dutch infantry.

End of turn 6 - more zombie units fall and the Dutch Cavalry move to attack a different horde. On the right hand side the Dutch infantry have received 7 casualties and in the center 6. Facing fresh zombie hordes they may not be able to hang on.

End of turn 7 - Two more units of Zombies are destroyed. All Dutch units are still active but  all have casualties. The unit in contact with the zombies has 9 casualties and will need to roll for morale next turn.

End of turn 8 - the Dutch infantry fail their morale and retire. The zombies are distracted by the skirmishers firing on them from behind and turn to attack them. The cavalry form up to charge and the other Dutch infantry move to destroy the remaining zombie unit/horde.

End of turn 9 - the final zombie unit is run down and destroyed by the cavalry.

The zombie menace is destroyed. No doubt the surviving inner parts of the European civilisation will push outwards over the weakened Medieval, Outlanders and Waste landers and so gradually re-building the world.

Anyway a fun set of games for me and I enjoyed the campaign and narrative aspects which were easy to do but provided some structure for each game and the series. Once I had the main story decided I then spent an enjoyable hour or so perusing the OHW scenarios for appropriate ones.

Figures:

Dutch Napoleonic are from Pendraken 

Zombies are N scale railway people from Aliexpress. They come painted, all I had to do was base them and add some red. This is a very quick and cheap way of creating a zombie horde. Not as good as Pendraken's but much easier to get the mass.

The buildings are from Outland Models and trees from Aliexpress.

Where to next? I think the moon.


Wednesday 26 June 2024

After the Third Apocalypse - Zombie Campaign part 4

 Part 4 of my campaign set in my post apocalyptic world of 2500AD. The Zombies of Russia periodically rise up and batter their way through eastern Europe intent on devouring the rich pastures of western Europe.

The campaign will involve four battles, all using the One Hour Wargames rules for Pike and Shot as adapted for Zombies and appropriate scenarios to build a narrative. Basically it will let me play with the three armies I have painted.

Following the Zombie victories in part 1 & 2 the Medieval forces stopped the Zombie menace in part 3. Part 4 is to hold out a desperate last stand to even the score.

The Medieval forces have the technology to produce armour that can stop zombies biting them and turning them to zombies. This stops their casualties becoming part of the problem. They have primitive guns and can run out of ammunition. 

30: Last Stand - the humans trying a final defence against the encroaching zombie horde.

Narratively the last stand is an attempt to halt the zombie menace long enough for the civilian population to escape.

Zombie rules adaptations are:

Zombies count as Infantry who can't shoot. Out of ammo from start of each game.
Zombie Unit Combat: When zombies cause any casualties on an opposing unarmoured unit they will get “reinforcements” from the enemy dead. These reinforcements will be equal to one half of the casualties caused rounded down. These will reduce the Zombie unit casualty marker by the same amount. The marker cannot be reduced below zero.
Human Unit Morale: When a human unit is activated, roll a D6 and add it to the current casualty marker of the unit. If the result is 15 or greater, the unit must retreat one full move. 

Scenario 30 Last Stand: The zombies need to destroy all the human units by the end of turn 15. Any zombie unit lost comes back the following turn from the start line.

All human units are considered elite and have +2 for all combat rolls.  One human unit is in a redoubt that means it is considered in cover and which takes the zombies one turn to enter and attack the humans within.

 I have added additional decorative terrain in the form of fields and a small wood to the layout. These have no impact on the game other than to make it look better. The large wood is impassable to all units.

Where a unit is destroyed will be marked by three red counters - to help show the carnage of the battlefield.

End of turn 1 - the zombies advance and humans fire at the advancing hordes causing 7 & 8 casualties from left to right.

End of turn 2 - the zombies continue their advance. On the left the human unit has run out of ammo. On the right another round of fire has managed to destroy the leading zombie horde. However this unit has also run out of ammo.

End of turn 3 -the zombies are crossing the ford and the bridge. The human units have retreated so they can charge the next turn and cause the first casualties.

End of turn 4 - the humans charge but cause few casualties.

End of turn 5 - the hand to hand combat continues. On the left the zombies reach 13 casualties and on the right only 4. Both human units have very few.

End of turn 6 - the combat continues. ( I realise now looking at the photos I forgot to update the zombies casualties on the left - oops!) On the right they reach 10 casualties vs 4 for the humans.

End of turn 7 - zombies on the left are destroyed. Human casualties there are 11. On the right the zombies casualties are 13 vs 6 for the humans. The line is holding!

End of turn 8 - The humans on the left have been destroyed. On the right the zombie unit is destroyed but the humans now have 8 casualties. Still the line may hold.

End of turn 9 - on the left the zombie hordes advance towards the redoubt. It will take them a few turns to get there and then they need to destroy the human unit.

End of turn 10 - The humans on the right still hold on but with 14 casualties they can only last one more turn.


End of turn 11 -The zombies on the left have been destroyed by fire from the redoubt. On the right the humans have gone down to the zombie hordes.

End of turn 12 - the zombies contact the redoubt from the left and on the right more zombies make their way through the town.

End of turn 13 - The zombies continue their assault but the humans hold.

End of turn 14 - another zombie unit is destroyed but two others take its place with more following.

End of turn 15 - the humans have held on! They would not last much longer but they have held on enough. The evacuation is completed.


So the score is now tied at two all. Maybe one more game to settle the issue.
I have always thought that modern battle techniques would not work against zombies and that Napoleonic tactics would be much better. One more game to see if I am correct.

Figures:
Medieval troops with guns are from Pendraken 
Zombies are N scale railway people from Aliexpress. They come painted, all I had to do was base them and add some red. This is a very quick and cheap way of creating a zombie horde. Not as good as Pendraken's but much easier to get the mass.

The town buildings are from Outland Models. A quick modelling night has created the fields to go inside the fences. I think it looks much better than before.